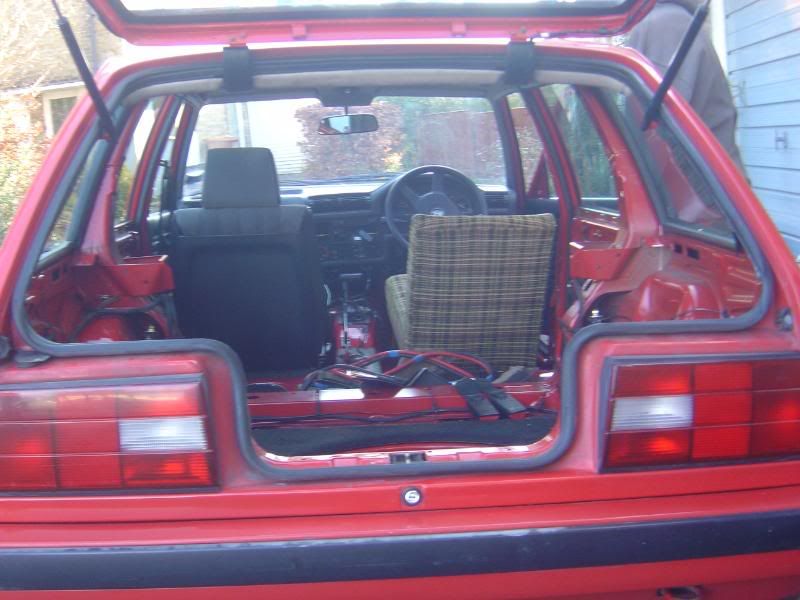
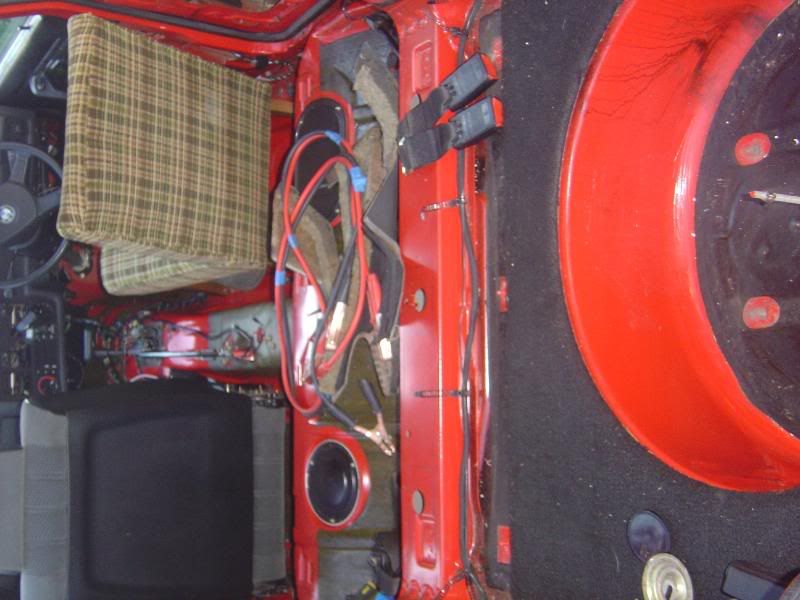
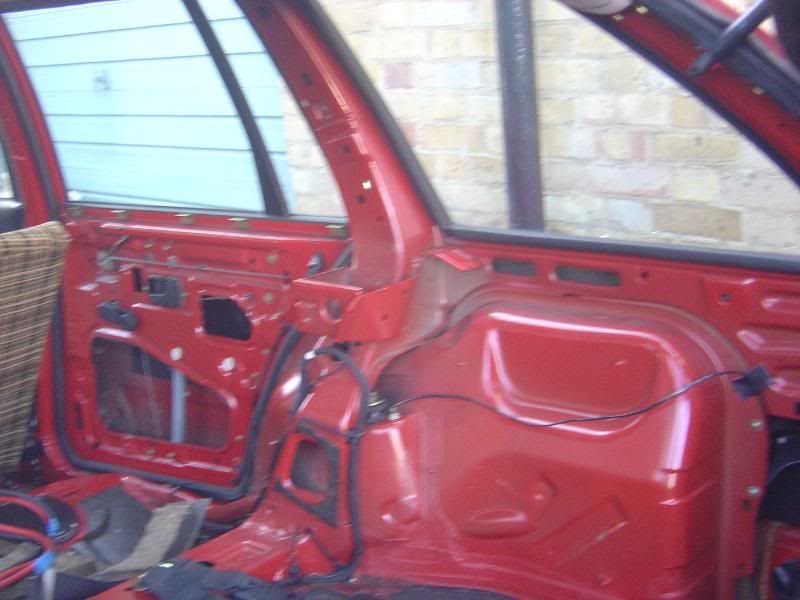
We started with this is because you can do it for free ;) and because we did not have to wait for any parts to arrive. We started on this immediately, removing as many items which were unnecessary for our purpose. The idea was to keep the car comfortable enough to go down to the shops but not as plush as when BMW delivered it. The first decision we took was to turn it into a 2 seater, when we bought the car it only came with one front driver’s seat. We switched this over to the other side converting it into the co-pilots seat, we have also already sourced a bucket seat and harness for the driver, which still need to be delivered. The only things left in the car now are the upper dash, the front seat and belt, the front door cards, the interior A pillar trim, the steering wheel, the steering column surround and the panel under the steering wheel. The most notable things that are gone are the rear seats, all the carpet, the rear seatbelts, the boot trim, rear door cards, the B and C pillar trim, and anything that was not welded to the car or deemed important. I think that we probably pulled out about 75 kilos worth of stuff.
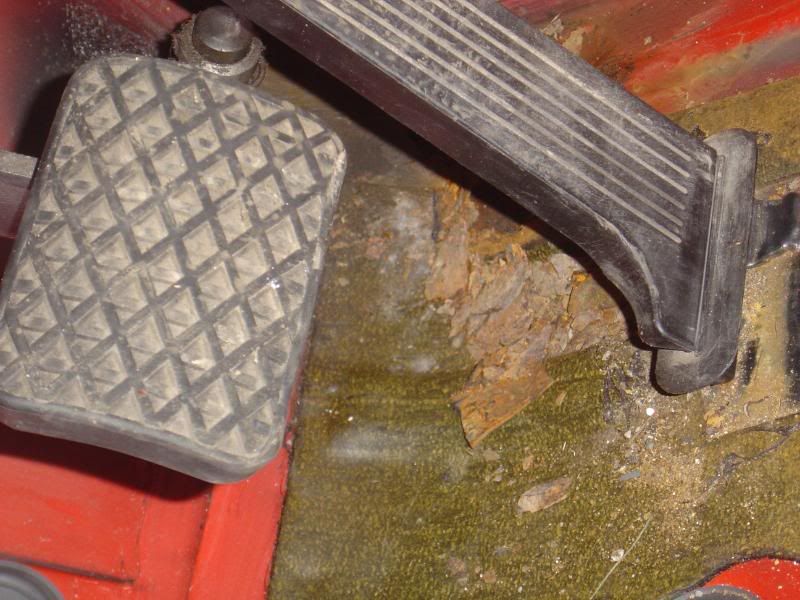
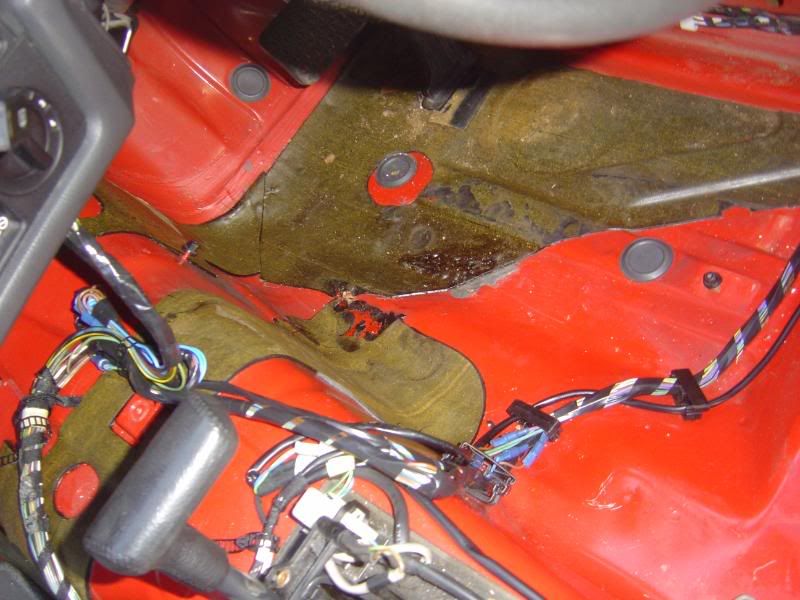
We did encounter some problems though; we initially did not see how we could remove the upper half of the rear seats. So a, TOP TIP what you have to do is insert a screw driver into the slots on the metal bar that holds the sears to the car. Which will un-hook the seats from the car, and then you can just lift them strait out. Another problem that we encountered was rust in the driver’s foot well, now our car is pretty solid and has very little rust except for this point which is rather annoying because its also a jacking point, so we will have to get this sorted at some point (as it is a possible MOT failure). Another thing we had to do was modify the interior loom ever so slightly, since we got rid of the trim around the gearlever there was no where to put the front electric window switches. We then came up with the idea of relocating them to the dash, we tried fitting one of the buttons into one of the pre-made holes in the dash and it fit! But we ran into a problem the wiring loom as it was too short! So we decided to extend the cables, we used some wires that came from house hold electrical cable and some bullet connectors to extend them. We then had to cut the old loom open lengthen the cable and then re-tape and reroute the loom. You can see the result in the pictures. I will post a picture of the dash as soon as I can get one.
Currently this is all we will do to make the car lighter; the next step will be to remove the black stuff that is glued to the interior of the car (sound deadening?). Another thing that we want to do is replace the passenger’s windows and the windows behind those with Plexiglas or acrylic. We also want to remove the sound deadening material from under the bonnet.
Some pictures of the interior
Cheers Aitor
No comments:
Post a Comment